Chemical experiment - Vesuvius on the table. How to make a volcano from soda and vinegar: an interesting experience for children
Most likely, I won’t be mistaken if I say that the “Volcano” experiment made from soda and vinegar is one of the most spectacular and favorite experiences among kids. Children can repeat it endlessly. But I don’t want to do it using the same template every time. As it turned out, with the same ingredients - soda, vinegar (citric acid) and water - you can come up with quite a few variations of the well-known experiment. We'll tell you about them.
Required Ingredients
Just in case, let me remind you of the ingredients that will be needed to conduct the “Vulcan” experiment:
- soda,
- vinegar, acetic acid or citric acid,
- water.
Ingredient ratio:
- 100 ml water, 1 teaspoon vinegar, 1 teaspoon soda;
- 1 glass of water, 2 teaspoons of soda, 1 teaspoon of citric acid.
I often use citric acid, since it has no odor, and conducting experiments with it is much more comfortable and safer.
There are several secrets on how you can add variety to the reaction:
- To make the experience more vigorous, you can use sparkling water instead of water.
- To delay the onset of the reaction slightly, do not mix water and citric acid directly. First dissolve citric acid or vinegar in water, and first wrap the soda in a paper napkin or paper towel.
- The reaction will be more effective if you add dye to the ingredients (you can use gouache, but dry food dyes for Easter eggs or liquid dyes for homemade soap are more suitable).
- For thicker and more stable foam, add a drop of detergent to the volcano.
- Also, the reaction will be more interesting if glitter or small sequins are added to the volcano mixture. The foam coming out of the volcano will also pull out the sequins. In the same way, lava coming out of a real volcano brings stones from deep within to the surface of the earth.
Although the Vulcan experience is the same ingredients each time, albeit in different containers, there is something to think about in each case. I have divided questions that you can ask your child or think about together into “Things to Think About” blocks.
Classic volcano - almost like a real one
The easiest option is to make a volcano from plasticine or salt dough. It is not at all necessary to use new plasticine; plasticine that was used previously, but has now turned into a gray mass, is quite suitable. We added sequin stars to the volcano you see in the photo below. To bring them to the surface, we had to awaken the volcano several times, each time increasing the amount of ingredients. In the end, everything turned out with 3 teaspoons of soda and 1.5 teaspoons of citric acid. And another tip: it’s better to pour the sequins last. And if you have them under the reagents, after adding water, quickly stir them in the crater of the volcano with a wooden stick.
Another option is a glass or plastic bottle with a tall, narrow neck (I prefer glass as it is more stable). It is very interesting to watch how the foam rises up the narrow neck from the inside, and then flows down the walls of the volcano.
Having carefully examined our kitchen, we noticed that the funnel was very similar to a volcano. The lower part of the funnel should be covered in several layers with cling film. The top of the funnel can also be covered with a layer of foil. And to avoid surprises, it is better to place the funnel covered with film on a tray.
Something to think about. If you don't skimp on the ingredients and the reaction turns out to be violent, you'll end up with a spitting volcano. Discuss with your child why? What makes a volcano spit in a crater?
Answer. The neck of the funnel is narrow, carbon dioxide is released rapidly and in large quantities. In a hurry to leave the funnel, carbon dioxide takes water with it.
If you don’t have a funnel at hand, you can use the top of a plastic bottle instead: cut off the top part of the plastic bottle (the cut part can be 7-10 cm high), cover the bottom in several layers with cling film or foil. The volcano is ready - you can make the filling.

A volcano in a glass, or how to make water boil without heat
If you don’t want to sculpt a volcano, but you don’t have a funnel or a plastic bottle at hand, you can make a volcano in an ordinary glass or jar and play with it in an interesting way. For example, tell your child that you can make water boil without using an electric kettle or stove.
Dissolve 2 teaspoons of baking soda in 1 glass of water (the glass should not be filled to the top, otherwise your volcano will burst its banks). Pour 1 teaspoon of citric acid into a glass. The water in the glass will “boil” - it will begin to bubble. Invite your baby to touch the glass. Is he hot? Is the liquid in it hot?
Instead of soda water in this experiment, you can make a solution of vinegar or citric acid (for 0.5 liters of water - 2.5 teaspoons of citric acid or vinegar). Then you will not add citric acid or vinegar to the glass, but soda.
Things to think about 1. Now pour water into another glass and add 1 teaspoon of citric acid. Nothing will happen. Let the child express his guesses as to why this happens and what the magic of water is in the first glass.
Add 2 teaspoons of soda to the second glass, now the water will “boil” in this glass. Discuss with your child what is happening, what reaction makes the water “boil”.

Answer. When found in water, soda and citric acid interact. This releases carbon dioxide. Since gas is lighter than water, gas bubbles rise to the surface of the water. Here they burst, thereby causing the water to “boil”.
If, before putting a spoonful of citric acid into glasses of soda water and ordinary water, you pour a little liquid from each glass, you will have another way to show that the liquids in the glasses are different - add red tea to them. In a glass of regular water, the tea will become a little paler, and in a glass of soda water it will turn blue.
Something to think about 2. Mix baking soda and citric acid in a cup. Watch, is anything happening? Nothing.
Answer. To start a reaction between soda or citric acid, the presence of water must be present, or one of the components must be in the form of a solution.
Things to think about 3. Pour the same amount of citric acid solution into two glasses. Place the entire spoon in one glass, and carefully pour the soda from the spoon into another glass. In which glass will the volcano be more violent?
Answer. The volcano in the glass where you lowered the entire spoon with soda will be more violent, since in this case a larger number of molecules meet, combine and react at once.
You can also compare volcanic eruptions based on soda water and lemon water. Given the same amount of ingredients, which one will be more stormy?
Boiling Lake
What I especially like about this option: you can give your baby two teaspoons, a container of soda and citric acid, and give him the freedom to experiment for a while.
You will need: a bowl of water, citric acid, soda, 2 teaspoons and a larger spoon for stirring. Let the water in the bowl be a lake. Show your child that if you add a little soda and citric acid to the lake, the lake will boil. Repeat and let the baby try it himself. And I assure you: until the containers with soda and citric acid are empty, the baby will be busy, and you will have time to do some of your business.

Something to think about. Try stirring your lake with a spoon or a stick. Will the lake boil more or less?
Answer. A volcano that is disturbed erupts more strongly, because by mixing the water in the lake, we help the molecules of soda and citric acid meet faster.
Something to think about. Add citric acid and soda to the water not at the same time, but one after another. Let's start with citric acid, then add soda. The lake will boil and stop boiling. Add a little more soda - nothing happens. What should I add? Citric acid. Added. The lake is boiling again. It stopped. Add more citric acid. Nothing. What should I add? Soda. Added. The lake is boiling again, etc.
Answer. Only a certain amount of soda and citric acid can meet and react. If there is too much soda in the water, after the eruption ends, the excess will settle to the bottom. If there is too much citric acid in the water, the lake will eventually fall asleep too. To “wake up” the lake again, you need to add what is missing.
Rough River
We had a boiling lake. Why not create a boiling river? Ideally suited for this purpose are the Fun Coaster construction kits from Bauer or Marbutopia. This will be the river bed. If you don’t have such a constructor, you can cut lengthwise either a plastic or foam pipe. Let's set the bed of our river in a basin or bathtub.
Prepare a mixture of baking soda and citric acid (ratio 2:1) and a jug or bottle of water. You can add dye to a mixture of soda and citric acid or water. We pour this mixture into the bed of our river, then begin to pour water from above. The water moves down and the river begins to rage.

If you close the bathtub opening with a stopper in advance, you will get a colored lake below. Let it be blue, for example. Follow it with a red river and your lake will turn purple.

Do you want to play with your child easily and with pleasure?
Bombs
Bombs are balls made of soda and citric acid that begin to bubble when dropped into water. Except
- 4 tablespoons of soda,
- 2 tablespoons citric acid
to make bombs you will need
- 1 teaspoon oil (sunflower or olive),
- water in a spray bottle.
You can add dry or liquid dye.
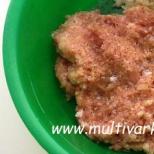
Mix the baking soda and citric acid well, add the oil and mix again. Flakes will appear. Try making bombs; if they don’t form well, lightly spray the mixture with water from a spray bottle. A reaction will begin, but it's not scary. The main thing is not to overdo it with the amount of water, otherwise an active reaction will occur and your bombs will turn out to self-explode.
We make bombs with our hands. If you want to make large bombs, snowflakes or transparent blanks for creating Christmas tree decorations are perfect for this purpose.
Bombs made from soda and citric acid explode in ordinary water.

By the way, these bombs can also be used for playing in the bathroom. And if you add sea salt and a drop of your favorite essential oil to the ingredients, you can arrange a bath with bombs not only for your baby, but also for yourself.
You can make bombs simply from soda with the addition of oil or plain water. As you understand, such bombs will explode only in water to which citric acid or vinegar has been added.
Something to think about. Make bombs with your baby from soda with the addition of oil or plain water. Place two containers of water in front of the baby, add vinegar or citric acid to one of them in advance (for the cup we have, I added 2 tablespoons of vinegar or 2 teaspoons of citric acid).
Throw bombs into two containers at once. The bob will explode in only one of them. Ask your child why? You can ask the question differently. For example, like this: “Although the liquid in both cups looks the same, in fact, different liquids are poured into the cups: one contains water, the other contains a solution of citric acid. Can you determine what is in each cup without testing the water? The bombs will help you."
 h
h
By the way, do not rush to pour out the water into which you dropped the soda bomb. A soda solution will come in handy when washing dishes!
Ice volcanoes
Did you know that ice volcanoes were found on one of the moons of Saturn, on one of the moons of Pluto and other objects in the solar system? (If you want to learn about ice volcanoes and much more, come with us to .) To see ice volcanoes, you don’t have to fly that far on a spaceship. Everything can be done at home.
Prepare a soda solution in advance and freeze it in small cubes. You can add dye. Before starting the game, prepare a lemon solution and a syringe. Place a few soda cubes on a flat plate and pour lemon water over them from a syringe. The ice will melt with hissing and bubbles. You can do the opposite: freeze lemon water and pour water from a syringe.
Something to think about. Do not reveal to your child the two main secrets about what water the ice cubes were made from and what water the syringe is filled with. If you've played with volcanoes before, your 5-year-old can probably figure it out on his own.
Something to think about. Before freezing soda or lemon water, add coloring to it. It’s very good if you get cubes of red, yellow, blue, and white colors. When placing ice cubes on plates for your baby, place yellow and red, yellow and blue, red and blue next to each other. When the volcanoes melt, pay your child’s attention to what color puddles are left behind.

As you can see from the photos, we had clear, blue, and red soda water cubes. While watching the volcano erupt, we saw pink, yellow and a lot of green. These are the miracles! and that's all!
You can also create an ice volcano in a glass: pour water into the glass (not to the very top, otherwise the volcano will immediately overflow its banks), add citric acid or vinegar, throw a cube of frozen soda water into the glass. (You can freeze lemon water and make soda in a glass.) The eruption will begin immediately and will continue for quite a long time - until the entire soda cube has melted. If you color the soda cubes, you can visualize the eruption of an ice volcano. Don’t forget to draw your child’s attention to how the color intensity of the liquid in the glass changes as the ice volcano erupts.

The duration of the eruption and visibility are the main advantages of an ice volcano compared to the method when we simply add soda to a solution of citric acid, or vice versa.
You will find more experiments with ice in the article.
Rainbow volcanoes
Volcanoes look very impressive when there are several of them and they are colored. It is convenient to make such volcanoes in containers of the same size. We fill them with a solution of vinegar or citric acid, add dry or liquid dye, a drop of liquid detergent for a thicker and more stable foam, add soda and observe.

Olga Happy Category: 6 comments
Chemical experiment volcano at home
Hello, dear readers! It's no secret that all children love the mysterious, beautiful and magical. Probably, your children also like everything fabulous and interesting? Wouldn't you like to play the role of a wizard for your baby? Surprise him with unusual phenomena, make a lasting impression?
I bring to your attention the experiments at home that we conduct with children. Today I will tell you about the Vulcan experience for children- this is an amazing, mesmerizing spectacle, children watch the volcanic eruption with interest, I recommend trying it. Your baby will definitely appreciate it!
In addition to this experiment, the kids and I conducted several more: an experiment with milk (you can watch) and an experiment with water (see), which I think your child will also appreciate!
- Cardboard
- Plasticine
- Jar (I took it from baby puree)
- Plate or tray
- Stapler
- Scissors
- Dishwashing liquid 1 tbsp.
- Soda 1 tbsp.
- Acetic acid
- Thinned paint
Making preparations for the Vulcan experiment

Experience at home Vulcan
Now I will tell you in detail how to do the volcano experience. By the way, during the experiment, the children took an active part - they covered a paper cone with plasticine, poured soda into a jar, poured detergent, colored the water with paints, after which the resulting colored solution was poured into the jar. The only thing I did myself was to cut out a cone, fasten it with a stapler and pour vinegar into the mouth of the volcano, after which the eruption began. So, let's proceed directly to the experiment.
How can a child talk about what a volcano is in an accessible and interesting way? You can, of course, arm yourself with books with cross-sectional pictures of a volcano and try to explain in words how magma is thrown out. Or you can make a volcano yourself at home. You will not only satisfy the curiosity of the young researcher, but also awaken interest in various sciences: geography, chemistry and geology.
Making a volcano at home is very easy. Simple products you can find at home and simple cleaning products can create beautiful effects. It is recommended to conduct similar experiments with children six or seven years old: at this age they will be better able to understand the essence of the action taking place. Although such a spectacular spectacle will be interesting for both children and adults.
Purpose of the experiment- to form in children a basic understanding of the natural phenomenon “volcano”, to clearly show the interaction of alkali with acid (neutralization reaction).
Tasks:
- explain how volcanoes work and what danger they pose;
- tell what an acid-base environment is;
- arouse the child's interest in research;
- develop self-learning skills;
- Teach children about the existence of an acid-base environment.
Materials and tools:
- flask or bottle;
- cardboard for making a “mountain”;
- plasticine to give the volcano its shape;
- water;
- soda;
- lemon acid;
- orange or red food coloring or gouache;
- dishwashing liquid;
- container for mixing ingredients and spoon;
- stapler;
- Plastic container;
- small figures (different types of animals, trees, stones).
Progress of the experiment
1. Let's make a volcano.
First you need to find a suitable container. You can use either a flask or a small juice or yogurt bottle. To give the bottle the appearance of a mountain, we make a blank from cardboard. Cut out a circle and make one cut along the radius. Fold the circle into a cone and secure it firmly with a stapler. Cut off the top of the cone.
We insert our container inside the figure - we get the frame of a volcano. Using plasticine, you need to give the volcano a shape: coat the cardboard with plasticine, make a “crater”, masking the neck of the container.

We place the volcano blank in a plastic container (or in a basin). We create an environment using different types of animals (dinosaurs, beasts), trees, stones. We pour stones at the foot of the volcano, arrange trees, arrange animals.
2. Prepare 2 lava solutions
First solution: fill the container with 2/3 of water, add food coloring (or gouache), a few drops of dishwashing detergent (so that there is a lot of foam) and 5 tablespoons of soda.
Second solution: dilute citric acid (recommended ratio - 5 tablespoons to 1.5 cups of water).
3. Let's start the eruption
Mix the mixture thoroughly in the volcano container. Slowly pour the citric acid solution into the mouth.
Watch the magic happen: a dormant volcano awakens and turns into a fire-breathing mountain!
Experience result
Fiery red foam erupts from the crater of the volcano.
 Volcanic eruption (no dye)
Scientific explanation
The volcano erupts as a result of the interaction of two substances - soda and citric acid. In chemistry, this process is called a neutralization reaction. Acid and alkali (soda) neutralize each other, releasing carbon dioxide. CO₂ foams the mixture poured into the crater and causes the mass to overflow over the edges of the crater. Dish soap makes the lava bubble more. We recommend conducting another experiment with a volcano, but this time with glowing lava.
Children are amazing experimenters. Their curiosity knows no bounds. And that is great! Parents should not only support the child’s desire to learn more, but develop this desire, give the little mind as much food for thought as possible, teach the child to think and draw conclusions.
Experiments and experiments carried out together with a child will not only give him bright, unforgettable impressions. It is experiments that teach a child to see the world in a special way, through the eyes of a researcher, to pose questions and find answers to them. And it is not at all necessary to buy expensive “Young Chemist” kits to conduct experiments. You can use what is in every home. For example, ordinary food vinegar and soda.
If your child has never seen the reaction of baking soda and vinegar, be sure to show him this phenomenon, which is familiar to you but surprising to him. This process is called a neutralization reaction. Its essence is that acid (vinegar) and alkali (soda) neutralize each other, releasing carbon dioxide.
You can tell an older child that carbon dioxide is constantly present in the air. This is what we exhale. Plants convert carbon dioxide into oxygen, which we inhale.
We also find carbon dioxide in carbonated water: it makes the water prickly.
The release of carbon dioxide can be confirmed by the following experiment.
To carry out the experiment you need:
- A small balloon that is easily inflated: it must be inflated and deflated before the experiment;
- Soda – 2 teaspoons;
- Vinegar – 1/4 cup;
- Water – 3 tablespoons;
- Glass bottle;
- Scotch.
Dissolve baking soda in water and pour the mixture into a glass bottle. Keep the ball and tape handy. Pour vinegar into the bottle and quickly place a ball on the neck of the bottle. Secure the ball tightly with tape to prevent it from being torn off. You will see carbon dioxide begin to fill the balloon.
Children's experience with vinegar and eggshells
An interesting experiment can be carried out by having vinegar and a raw egg on hand. It will be especially useful for those kids who do not see the value in morning procedures and do not want to do it in the morning.
Take a chicken egg and put it in a jar. Pour vinegar over the egg, close the lid and leave for 4-5 days. After the allotted time, carefully remove the egg, wash it and give it to the child. The egg shell became soft - the acid dissolved calcium, which provided the hardness of the eggshell. What does this have to do with the reluctance to brush your teeth? The fact is that in the mouth, where the teeth are not brushed, the same acidic environment is formed as the one in which we placed the egg. And calcium, which gives strength to our teeth, dissolves in it just as well, although not so quickly. Therefore, if you want to have strong teeth, do not forget to brush them daily!
Childhood experience - a volcano made of soda and vinegar:
Using vinegar, soda and dye, you can show your baby a real volcanic eruption. The volcano, of course, needs to be made, but it’s not difficult for mom.
We take pieces of old used plasticine (you can also take new one, if you don’t mind), divide the plasticine into two parts. From one we make the bottom of the volcano: it must be of sufficient thickness. This can be entrusted to the child.
 From the second half we make a hollow cone, the upper hole of which will be the crater of the volcano. We connect both parts tightly so that the internal space is airtight.

 We place our volcano on a tray, tray or large plate.
 Add a tablespoon of baking soda and dye. If there is no dye, you can use red beetroot juice, although the lava will not be as bright.
 Pour a teaspoon of dishwashing liquid into the mouth. The volcano is ready to erupt. Pour 1/4 cup of vinegar into its mouth and the volcano wakes up!

Here we have a simple but interesting volcano made from soda and vinegar.
You can watch a volcano erupt at home not only on TV. With the help of a small chemical experiment, you will arrange a real eruption on a fairy-tale island.
From this article you will learn
All that is needed
For the experiment you will need some household chemicals and decorative elements to create an island. The volcano island can be made from natural materials or use dinosaur sensory box sets.
A model of a volcano is made from plasticine. Creating a fabulous volcanic island for the experience is the main component of it and serves to develop the child's imagination and creativity. Such activities will help instill a love for chemistry and geography. The child will develop fine motor skills of the fingers while making plasticine terrain and its inhabitants.
To make an island you need:
- cardboard;
- stapler or narrow tape;
- box with colored plasticine;
- small animal toys;
- colorful pebbles;
- a large plastic box or bowl in which the island will stand;
- glass or plastic container with a volume of 200 ml for the volcano crater.
To conduct the experiment you will need:
- soda 20 g;
- food coloring:
- vinegar 9%;
- dish detergent 25 ml;
- water 100 ml.
Usually the experiment continues until mom runs out of all the baking soda and vinegar, so be patient.
Children cannot carry out the experiment on their own without adults. If vinegar gets into a child's eyes or mouth, it can cause a burn to the mucous membranes, and if swallowed, it can cause a burn to the esophagus.
Making a fairytale island

You can build an island in a large plastic container. Pour real water and line the bottom with round pebbles. Make a container for the volcano from a baby food jar or an old glass. For the mountain inside which the container will stand, you need to make a cardboard model; your child will be happy to cover it with plasticine.
The sequence of making a volcanic mountain:
- cut out a circle of the required diameter from thick cardboard;
- make a cut from the edge to the center of the circle;
- roll up a cone;
- the edges of the cone are fastened with a stapler or tape;
- cut off the upper part of the cone at a height equal to the container chosen for the volcano;
- place the container inside the cone.

I coat the top of the mountain with plasticine. To do this, roll out small brown plasticine cakes and stick them to a paper cone, completely covering the cardboard. The top of the volcano can be made of red plasticine, which will imitate hot lava.
They place a volcanic mountain on a dry island of pebbles. They are seated around small rubber animals that are among children's toys. Multi-colored amazing dinosaurs or wolves, foxes, bunnies, bears and other inhabitants of the forest and jungle. Depending on what animals were planted, vegetation for the island is selected. Large tree ferns and horsetails for dinosaurs, and ordinary fir trees and birches for bunnies and foxes.
Plastic plants are also often sold in sets for children's games. You can use a leaf of a living fern and twigs of plants if it is summer outside. Plants can also be molded from plasticine, made from threads and beads or ordinary cardboard.
You can make small houses out of cardboard for plastic Indians and soldiers. It is better to use cardboard to make plants and houses when the island is in a container with blue-dyed sand instead of water or on a blue plasticine sea.
Conducting an experiment
Finally the island is ready. All the toy animals and people froze in anticipation of an interesting event - a volcanic eruption. They know that the volcano is not real and therefore are not afraid of it.
To conduct the experiment, pour a tablespoon of soda into the volcano jar. Add a tablespoon of dishwashing detergent. Red or orange food coloring is dissolved in 100 milligrams of water and added to the baking soda and detergent. The base for the experiment is ready, all that remains is to add vinegar. For mom, you can let your child pour vinegar into the volcano on his own, under her supervision, so that he doesn’t do it in her absence. It is better to repeat the experiment for an encore, pouring vinegar into the “mouth” of the volcano and pouring soda into it until the child is interested in it and asks to repeat the experiment.
When vinegar is added, the baking soda will begin to foam, erupting from the “volcano mouth” like red or orange lava. The detergent will allow the “lava” to foam longer and more abundantly, overflowing from the vent and flooding the surrounding area along with plants and animals that were carelessly located too close.
Afterword
The safest way to experiment with a volcano for young children is to use baking soda and vinegar. It can be repeated many times, and getting the necessary materials for the experiment is not difficult.
The most interesting thing about the experience is creating your own fairy-tale island with your child, which can be used not only for the “Volcano” chemical experiment, but also for an exciting game.
With older children, you can conduct the “Vulcan” experiment at home using  , potassium permanganate and glycerin. For the experiment, ammonium dichromate is poured into an evaporation bowl in the form of a slide, in the middle of which a depression is made. Add a little potassium permanganate and a few drops of glycerin to the recess.
After a few minutes, due to the interaction of potassium permanganate and glycerin, the ammonium dichromate will ignite. Sparks will shoot out from the volcano in all directions, and a fountain of fire will begin to erupt. Before starting the experiment, the bowl must be placed on foil so as not to burn the surface on which the experiment will take place.
Ammonium dichromate can simply be set on fire, and it will burn like a volcano, spewing sparks. The experience is exciting, but children should not be allowed to do it without the presence of adults. Burns can be caused not only by sparks, but also by the chemicals used.
Good luck with your experiments!