Delicious sponge cakes. How to quickly prepare a fluffy sponge cake for a cake
One of the most common cakes is sponge cake. It is easy to prepare, unless, of course, you are making a culinary masterpiece out of it and takes a little time.
Moreover, ready-made biscuit cakes can be purchased in the store, and this will free you from the need to bake biscuits.
If you want to make a cake from start to finish with your own hands, then first I’ll tell you how to bake a sponge cake for a cake at home. This does not require much time, effort or special products.
This will be a classic version of a biscuit
How to make a classic sponge cake
I’ll tell you the recipe for a classic sponge cake, it always turns out tall, fluffy and tender.

To prepare it we need - 6 eggs, 230 grams of flour, 180 grams of sugar, 2 teaspoons of baking powder, vanilla or vanilla extract

First we need to separate the whites from the yolks

Add a pinch of salt to the whites and beat at medium speed.

The proteins should form a fluffy mass.

Add half the sugar and continue beating

This must be done until the so-called “sustainable peaks”

Add the remaining sugar to the yolks and beat until the mass turns light and increases in volume.

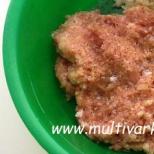
The result should be a mass like this

Place the yolks in a bowl, add the whites to them and, using gentle movements from bottom to top, mix

Add baking powder to the flour, sift it and sift it again, add it in portions to the egg mixture

Knead the dough in a circular motion, adding vanillin. As soon as the dough becomes homogeneous, stop kneading, otherwise it may become liquid

The baking dish can be greased with vegetable oil and sprinkled with flour, or lined with baking paper

We put the dough in the mold, we will bake one large sponge cake, and then cut it into pieces, you can divide the dough and bake the cakes separately

We put the pan in the oven, preheated at 180 degrees for 35 minutes, you can check the readiness with a stick inserted into the middle of the cake, it should remain dry and clean

Leave the finished biscuit in the open and switched off oven for 10 minutes, then carefully remove from the mold and leave to cool.
It is better to wrap the cooled biscuit in cling film and put it in the refrigerator for a while

With a large knife it can be easily cut into pieces; inside it turns out fluffy and porous.
How to bake a chocolate sponge cake

To prepare it you need a mixer or a whisk; beating the egg mass with a fork is not recommended

Necessary ingredients for making biscuit
Just as in the classic version of preparing a sponge cake (see), separate the egg whites from the yolks and beat them separately - the whites until foamy, and the yolks until they lighten and increase in volume.
Divide the sugar in half, add to the whites and yolks and beat them again.
Add the whipped yolks to the whipped whites and mix with a mixer at low speed.

Add sifted flour to the resulting mass

Finally, mix the remaining flour with 2 - 2.5 tbsp. spoons of cocoa, sift with flour

Using a wooden spatula, stir in a circular motion until smooth.

The dough should be completely coffee-colored, the volume of your mass will decrease slightly

Melt a tablespoon of butter in the microwave, put a couple of tablespoons of dough in a separate small bowl, pour the butter into it, mix thoroughly and return to the total dough, mixing everything together.
If you pour the oil into the whole dough at once, you will have to stir it for a long time, and it may settle
Without adding butter, you get a classic sponge cake; adding it, we get a creamy one.

Place the dough in the prepared form and place it in the oven, preheated to 180 degrees for 25 - 30 minutes, check the readiness with a wooden stick

Place the finished biscuit and let it cool
Now I want to show you the difference between biscuits made with baking powder and without baking powder.
What makes them different is their height and the porosity of the biscuit itself.
Depending on what or what kind of cake you are baking a sponge cake for, you may or may not use baking powder.

This sponge cake is baked with baking powder

No baking powder was used to bake this crust.

The right biscuit, with baking powder, is more porous and airy, while the left one is denser.
Therefore, when baking a sponge cake, you decide for yourself whether you need denser cake layers or not, and depending on this, use baking powder.
Strawberry sponge cake with curd and yoghurt mousse


Using a classic recipe, we prepare a sponge cake for our cake (see how to make a sponge cake above), cut it into 2 layers

Prepare the buttercream, for this we need 200 g of butter and a can of condensed milk

Pour condensed milk into the butter, add vanillin and beat with a mixer until creamy.

Coat the bottom layer of the sponge cake with apple and pear jam, you can use any

Apply cream on top

Cover with the second cake layer and coat with cream

Coat the cakes with cream on all sides, sprinkle the sides with crumbs of crushed sweet crackers

Decorate with cookies (droplets of sponge cake with bizet)

Grate the chocolate on top and our cake is ready for Sunday tea.
How to make sponge cake video - Grandmother Emma's Recipe
Oh guys... Hello everyone! I myself don’t believe that I’m writing this, but I’ve finally matured enough to read this article... I've had this idea for many months: collect, as they say, a heap of all the recipes for my favorite (and not only my) creams, which I use for sponge cakes.
And so, thanks to your numerous requests and entreaties))) I finally decided to show off all the ins and outs of your cakes.
Cream for a sponge cake is a rather relative concept. Of course, you can use the recipes that I present below not only in combination with sponge cake, but also in other cakes, cupcakes, tartlets, eclairs and other desserts.
And before we start with the recipes, I’ll tell you something very important that you probably wouldn’t have guessed. Since many of today's recipes involve cream, I'll reveal a secret trick from baking queen Martha Stewart:
If you accidentally over-whip the cream and see that it has already begun to curdle, simply add a couple of tablespoons of cold liquid cream and stir gently. This will return the cream to its desired state.
So let's get started. There is a lot of material today. I promise it will be interesting.
1. Ricotta cake cream
I'll start with the freshest one, which I tried literally today.
This is a very delicate cream with a refined, unobtrusive taste and aroma of vanilla.
Personally, this finished cream reminded me a lot of mascarpone cheese.
If desired, this cream can be combined with fruit or berry puree. Or you can add a handful of chocolate drops.

We will need:
- heavy cream 33−36%, cold - 200 gr.
- ricotta cheese - 400 gr.
- sugar - 3 tbsp.
- vanilla extract - 1.5 tsp. ( can be found here )
- fruit/berry puree - 40 gr. (optional)
Preparation:
- Using a mixer, beat the cold cream until stiff peaks form.
Don't beat the cream too hard or it may curdle when you mix it with the ricotta.
- In a separate container, beat the ricotta with sugar and vanilla essence for about 3 minutes until the sugar melts. If desired, add fruit and berry puree and mix.
- Lastly, add the whipped cream and gently mix with a spatula using folding movements from bottom to top.
2. Mascarpone cream
Perhaps this cream is the most frequent guest in my house. I use it not only for sponge cakes, but also for... And - this is actually space!
I change the fruit component of this cream and every time I get a completely new taste and color. But even without extraneous additives, cream with mascarpone excellent.

For this we need:
- heavy cream 33−36%, cold - 375 gr.
- mascarpone cheese - 360 gr.
- sugar - 75 gr.
- vanilla extract - 1.5 tsp.
- fruit puree (banana, raspberries, strawberries, etc.) - 100 gr. (optional)
Cooking method:
- Pour the cream into a mixer bowl and place in the freezer for 15 minutes with a whisk.
Additional cooling will help us whip the cream much faster.
- Then add mascarpone, sugar, vanilla essence to the same bowl and beat first at minimum speed, and then at maximum, until stable peaks form.
- At the end, if desired, add fruit puree and gently mix it into the cream with a spatula.
Before assembling the cake, put the cream in the refrigerator.
3. Cream cheese (cream cheese)

Grocery list:
- curd/cream cheese - 200 gr. (type Hochland Cremette )
- powdered sugar - 70 gr.
- vanilla extract - 1 tsp.
- heavy cream 33−36%, cold - 350 gr.
Preparing the cream:
- Place cream cheese, powdered sugar and vanilla essence in a mixer bowl and beat until smooth.
- Separately, beat the cold cream until stiff peaks form.
- Transfer the whipped cream into the bowl with the cream cheese and gently mix with a spatula using folding movements from bottom to top.
Before assembling the cake, put the cream in the refrigerator.
4. Chocolate cream with condensed milk
This cream is one of my favorite butter creams. He is originally from the Soviet Union. Does everyone remember the Prague cake? It was with this cream that our iconic Soviet cake was prepared.

Let's take for it:
- butter, softened - 250 gr.
- condensed milk - 150 gr.
- water - 50 gr.
- egg yolks - 2 pcs.
- cocoa powder - 12 gr.
- vanilla extract - 1 tsp.
Recipe:
- Bring the butter to room temperature (ideally 20ºC).
- While the oil is heating, mix the condensed milk with water in a small saucepan, then add 2 yolks and mix until smooth.
- Place the saucepan on low heat and, while continuously stirring with a spoon, bring the mixture to a thick state. The finished syrup should leave a clear mark on the back of the spoon when you run your finger across it.
Be careful not to bring the mixture to a boil, otherwise the yolks will cook.
- Pour the finished syrup into a clean container and cool to room temperature.
- Beat the soft butter very well with a mixer until fluffy (about 10 minutes).
- Continuing to beat, add cocoa in three additions until a homogeneous consistency is obtained.
- Next, add the cooled syrup one spoon at a time, whisking thoroughly after each portion. At the end, add vanilla essence.
Do not refrigerate this cream before use.
5. Cream with boiled condensed milk
Another recipe with our favorite condensed milk, but this time with boiled milk, and with the addition of whipped cream, which makes the cream more airy and light. I really liked this alternative to heavy buttercream.

Grocery list:
- heavy cream 33−36%, cold - 250 gr. ( order )
- butter, softened - 100 gr.
- boiled condensed milk - 250 gr.
Make the cream as follows:
- In a mixer bowl, beat the cold cream until stiff peaks form (I also recommend cooling the mixer bowl and whisk before whipping).
- In a separate bowl, beat soft butter together with boiled condensed milk until fluffy (at least 5 minutes).
- Add the whipped cream to this mixture and gently fold it in with a spatula using folding movements from bottom to top until a homogeneous consistency is achieved.
If you do not plan to work with the cream right away, then put it in the refrigerator until use.
6. Charlotte Buttercream
It goes perfectly with the juicy soaked sponge cake. If you prefer buttercreams in your biscuits, then this recipe is for you.

Ingredients:
- sugar - 180 gr.
- milk - 120 ml
- egg - 1 pc.
- vanilla extract - 1 tsp.
Recipe:
- Place 100 grams in a saucepan. sugar and milk, mix and put on fire until boiling.
- Meanwhile, thoroughly grind the egg with the remaining sugar (80 g).
- After the milk has boiled, pour 1/3 of the milk into the egg mixture, stirring with a whisk.
- Then return this mixture back to the saucepan and place on low heat.
- Constantly stirring with a spoon, bring the mixture until thick (there should be a clear mark on the back of the spoon if you run your finger).
- Remove the finished milk syrup from the heat, pour into a clean bowl and cool. The cooled syrup should have a consistency similar to condensed milk.
- Beat soft butter with a mixer until very fluffy (5-10 minutes) and, continuing to beat, add milk-sugar syrup one spoon at a time, beating the butter thoroughly after each portion of syrup.
- At the end, add vanilla essence and beat a little again.
The Charlotte cream does not need to cool before assembling the cake.
7. Curd cream for sponge cake
Cream for cottage cheese lovers. Personally, I'm not a big fan of cheesecakes. I prefer the more subtle flavor of ricotta. But knowing the tender feelings many of you have for cottage cheese, I am publishing the following recipe.

If you have wet cottage cheese, weigh it in gauze for several hours.
We will need:
- cottage cheese, dry and fatty - 500 gr.
- milk - 100 ml
- powdered sugar - 120 gr.
- butter - 10 gr.
- corn starch - 1 tsp.
- vanilla extract - 1 tsp.
Recipe description:
- We rub the cottage cheese through a sieve to get rid of lumps.
- In a saucepan, mix milk, half of the powdered sugar (60 g) and starch. Add oil and place on low heat.
- While constantly stirring with a whisk, bring the milk to a boil and cook for 2-3 minutes until the cream thickens well.
- Cool the resulting cream to room temperature, stirring occasionally with a whisk.
- Meanwhile, using an immersion or regular blender, puree the cottage cheese with the remaining powdered sugar (60 g) until a smooth, creamy mass is obtained.
- Add vanilla essence and cooled custard into the curd mass and mix with a spatula until smooth.
- Place the finished cream in the refrigerator for 20 minutes to allow it to set, after which we begin assembling the cake.
8. Sour cream
For a sponge cake, we need a thick sour cream that will hold its shape well. Otherwise, the cream will saturate the biscuit and the cake will turn into porridge.
Therefore, for sour cream we need the fattest sour cream.

Namely, we will need:
- fat sour cream, 30% - 500 gr.
- sugar - 200 gr.
- vanilla sugar - 10 gr. (I advise dr. Oetker with natural vanilla )
It is prepared very simply:
- In a mixer bowl, combine all ingredients and beat until fluffy and fluffy.
Before assembling the cake, put the cream in the refrigerator.
9. Yogurt chocolate cream
This recipe is my accidental invention. But despite this, the cream turned out very tasty and unusual. The consistency is approximately like sour cream.

For the recipe we take:
- dark chocolate - 50 gr.
- natural Greek yogurt - 500 gr.
- condensed milk - 200 gr.
If you want a more chocolatey taste or a firmer cream, double the amount of chocolate.
Cooking process:
- Break the dark chocolate into pieces and melt in a water bath, stirring occasionally. Then cool to room temperature.
- In a mixer bowl, combine yogurt with condensed milk and beat with a mixer until creamy.
- Place 2 tablespoons of yogurt cream into a bowl with cooled chocolate and stir.
- Transfer the resulting mixture back into the yogurt and gently mix with a spatula using folding movements.
- Place the finished cream in the refrigerator for 1-2 hours until it hardens.
10. Strawberry cream with white chocolate
I learned this recipe at a pastry course. Although I could be wrong - it was a long time ago. But the most important thing is that this cream is very tasty and quite unusual.

For the cream we need:
- butter, softened - 200 gr.
- powdered sugar - 200 gr.
- white chocolate - 200 gr.
- strawberries - 100 gr.
Recipe:
- Cut the strawberries into small pieces, place them in a saucepan and simmer for 15 minutes or until the liquid has evaporated. Then remove from heat and cool.
- Break the white chocolate into pieces and melt in a water bath, stirring occasionally. Then remove from heat and leave to cool.
- Beat the butter and powdered sugar with a mixer until fluffy (5-10 minutes).
- Add cooled chocolate and mix. Then add strawberries and mix thoroughly again.
The cream is ready to use.
11. Cream Diplomat
Cream Diplomat is a combination of custard and whipped cream. Especially good in chocolate version. But vanilla with fruits or berries is also very good.

Compound:
- milk - 250 ml
- sugar - 60 gr.
- egg yolks - 45 gr. (2 medium)
- corn starch - 30 gr.
- heavy cream, 33−35% — 250 ml
- vanilla extract - ½ tsp.
- powdered sugar - 1 tbsp.
- dark chocolate - 100 gr. (optional)
Cooking method:
- First, make the custard. To do this, bring milk and half the sugar (30 g) to a boil in a saucepan, stirring occasionally.
- In a separate bowl, whisk the egg yolks, remaining sugar (30 g) and starch.
- As soon as the milk begins to boil, remove from the heat, reduce the heat to low and pour 1/3 of the milk into the yolk mixture while stirring constantly.
- Pour the resulting mixture back into the saucepan with the milk, again stirring with a whisk.
- Return the saucepan to the heat and, stirring constantly, bring the cream to a boil. A few seconds after bubbles appear, remove from heat.
- If you need chocolate cream, then after removing the saucepan from the heat, add finely chopped chocolate and mix until smooth.
- Pour the custard into a clean bowl, cover tightly with cling film and leave for several hours or overnight to set.
- Separately, whip very cold cream with vanilla essence to soft peaks. At the end, add 1 spoon of powdered sugar and beat a little more until stable peaks form.
- Lightly whisk the completely cooled custard and gently fold in the whipped cream with a spatula, folding it from bottom to top, achieving a homogeneous consistency.
You can add any fruits or berries you wish to the prepared Diplomat cream. And the cream is ready to use.
12. Cream of cocoa and milk
Perhaps the simplest and most affordable cream of all presented.

For it we will need:
- flour - 60 gr.
- cocoa powder - 25 gr.
- sugar - 200 gr.
- milk - 600 ml
Preparation:
- In a saucepan, mix the sifted flour and cocoa, add sugar and mix.
- Add about 1/3 of the milk. Mix with a whisk. Then pour out the remaining milk and mix everything thoroughly again. This is done to ensure that there are no lumps.
- Place the saucepan over moderate heat and, stirring constantly with a whisk, bring the cream to a boil.
- When the cream begins to boil and many large bubbles appear, remove the saucepan from the heat and cool, covering tightly with cling film.
After cooling, the cream is ready to assemble the cake.
13. Protein cream (Italian meringue)
Another economical cream, but in certain combinations it is incomparable. In this recipe we brew egg whites, so you don’t have to worry about any bacteria. Protein cream goes well with sour fillings. For example, you can layer your sponge cake and cover the cake with this cream.

The only difficulty is for this recipe You need a kitchen thermometer ( can be purchased here).
We take:
- egg whites - 55 gr. (about 2 pcs.)
- a few drops of lemon juice
- water - 30 ml
- sugar - 170 gr.
- vanilla extract - 1 tsp.
Cooking:
- Place egg whites with lemon juice in a mixer bowl.
- Pour water into a saucepan, add sugar, mix gently with a silicone spatula and place on moderate heat.
- At the same time, we begin to beat the egg whites at high mixer speed (5-10 minutes).
It is important not to overbeat the egg whites, otherwise the mixture will begin to fall off. After the whites have been whipped into a stable, fluffy meringue, reduce the mixer speed to medium.
- When the syrup reaches 120ºС, remove the saucepan from the heat and slowly pour the syrup into the whites in a thin stream, continuing to operate the mixer at low speed. After pouring in the syrup, beat for another 5 minutes until the mixture becomes glossy and fluffy.
14. Chocolate cream - ganache
For true chocolate connoisseurs - the richest chocolate cream.

Grocery list:
- heavy cream, 33−36% - 250 g
- liquid honey - 40 gr.
- instant coffee granules or powder - 1 tbsp.
- dark chocolate, 65−70% - 200 gr.
- butter - 75 gr.
Recipe:
- Mix cream, honey and instant coffee in a saucepan and bring to a boil over moderate heat.
- Place finely chopped chocolate and butter in a bowl.
- Pour the coffee cream into the bowl with the chocolate and mix thoroughly with a whisk until a homogeneous, smooth consistency is obtained.
- Cover the ganache tightly with cling film and leave to set for at least 6-8 hours at room temperature.
After this, the ganache is ready for use. There is no need to stir or beat it anymore.
15. Oreo Cookie Cream
One of my latest cream recipes with amazing taste.

Required ingredients:
- heavy cream - 250 gr.
- mascarpone cheese - 120 gr.
- powdered sugar - 50 gr.
- vanilla extract - 1 tsp. (optional)
- Oreo cookies - 100 gr.
Preparation:
- Pour the heavy cream into a mixer bowl and place in the freezer for a few minutes.
- Then add mascarpone, powdered sugar and vanilla essence. Beat everything until it becomes a fluffy thick cream, first at low, then at high speed.
- Grind the cookies in a blender into fine crumbs and carefully mix them into the resulting mass with a spatula.
Before assembling the cake, the cream is stored in the refrigerator.
I think that's enough for a start. If you have any wishes, write in the comments. We will add more.
I note that recipes Nos. 1, 2, 3, 4, 5, as well as 13, 14 and 15 Suitable for both filling and leveling sponge cakes. In other cases, it is better to use for leveling and finishing coating whipped cream with a spoon of powdered sugar.
Oh, and I’ll also add that almost all of today’s recipes are not very sweet and are designed for biscuits soaked in sweet syrup. Keep this in mind.
Have a nice weekend everyone!
Good luck, love and patience.
I have never made such a tall biscuit!!!
Even when I baked a sponge cake according to the classic recipe, where you need to carefully separate the whites from the yolks, beat until you're crazy... this is not required here, which is very convenient, and the result exceeds your wildest aspirations!

In fact, the dough for this simple sponge cake is prepared exactly the same way as for apple charlotte. You just need twice as many ingredients.

And the result is a tall, fluffy cake layer, from which you can build a huge cake for the whole family!

There is another recipe on the site for a very tasty, tender, fluffy sponge cake - with starch, if you are interested, you can try both for comparison :)
Ingredients:
For a 24 cm mold:
- 6 eggs;
- 1 cup of sugar;
- 1 cup flour;
- 1 teaspoon baking soda (or 1.5 teaspoons baking powder);
- 1 tablespoon 9% vinegar or lemon juice.
Now the recipe is also in video format! 😀
How to bake:
Break the eggs into a tall bowl (as I already noted, there is no need to separate the yolks), add a glass of sugar and beat with a mixer until a fluffy, light, thick mass is formed. This will take 1.5 – 2 minutes. Important! You need to beat, starting at the lowest speed of the mixer, gradually increasing it to the maximum: 1-2-3-4-5... (my mixer has 5 speeds, each for half a minute or a little more). Look at the consistency of the foam, it should become thick and light, when traces from the mixer beaters begin to remain, that’s enough :)

This is the state to which you need to beat eggs for biscuit dough:


Pour a spoonful of soda on top, quench it with vinegar and mix. Attention - update! I read an article where it is written that you should mix baking soda with dry ingredients (flour), and an acid to extinguish it (vinegar, lemon juice) with liquid ingredients. And it is impractical to extinguish it in a spoon or on the surface of the dough, since all the carbon dioxide that creates bubbles goes into the air and not into the dough. And since there are no liquid ingredients in this sponge cake, except eggs, I switched to baking powder in this recipe :) I mix it with flour and sift it all together into the dough.
Then gradually add a glass of sifted flour, mix thoroughly but carefully with a spoon.

For clarity, here is a gif image of how to properly mix the biscuit dough:

It is best to bake a sponge cake in a springform pan, the bottom of which is covered with confectionery parchment or tracing paper, greased with sunflower oil. The most convenient way is to lay paper on the bottom of the mold, put it on and fasten the sides, and then trim off the excess paper along the edge. Lightly grease the inner sides of the mold with vegetable oil so that the biscuit does not stick. But you don’t need to grease it too generously: the greasy walls of the pan can prevent the cake from rising.
Better yet, grease the pan with a thin layer of soft butter and sprinkle with flour. Fat will prevent the biscuit from sticking, and the thinnest layer of flour will allow the biscuit dough to rise well, enhancing the adhesion of the dough to the surface of the mold due to its texture.
Pour the dough into the mold. This is how properly prepared biscuit dough flows: it spreads in a wide ribbon.

Put it in the oven. The original recipe says to put it in cold, but I always put this dough in an already well-heated oven. It seems to me that otherwise the cake will not fit. But I don’t want to take risks and test something.

So, put the pan in an oven preheated to 180C and bake at the same temperature until done.
And since the cake is high, it will take about 45-60 minutes. From time to time you can open the door slightly and quietly look into the oven. If the cake is browned around the edges and the middle is runny, reduce the heat slightly so that the middle is baked. Just don’t reduce it sharply, otherwise the biscuit will shrink. If the cake looks ready, test it in the center with a wooden stick. Doesn't the dough remain on it? Great - the biscuit is ready!

We take the pan out of the oven, let the cake cool for about 10 minutes, then, carefully trimming the edges with a knife, open the pan. We turn the cake over onto the lid of a large pan, quickly remove the paper from the bottom and turn it back onto the dish.

A gorgeous tall sponge cake is ready! When it has completely cooled down, ideally the next day, you can cut it with a sharp wide knife into 2-3 cake layers, select the cream and build a big, delicious cake!
I am sure there are few people who can refuse a sponge cake. It truly fills the confectionery product with tenderness and airiness, especially if you prepare it correctly. Most housewives want to learn how to cook it so that it is difficult to tear your ears away from their baking.
Nowadays, there are a large number of recipes and different interpretations of this base for cakes and rolls. It consists of chocolate cakes that do not require long kneading of the dough and leaving to swell. A delicate sour cream with pieces of fruit is used as a layer, and grated chocolate is used for decoration. I think that it would not be a shame to treat your loved ones and relatives to such a dessert.
So, below, especially for you, dear reader, are the most delicious and simple recipes for biscuit delicacies, which are used by knowledgeable chefs in all corners of our earth.

Ingredients:
Mold diameter - 22 cm
- flour - 80 gr
- corn starch - 50 g
- eggs - 5 pcs
- sugar - 200 gr
- turmeric - 1/2 tsp
- baking powder - 1 tsp
For cream:
- milk - 250 ml
- sugar - 50 gr
- yolks - 2 pcs
- flour - 1 tbsp. l
- heavy cream at least 33% - 300 ml
- powdered sugar - 70 g
- zest of one lemon.
Cooking method:
Place the separated whites from the yolks in a deep bowl, add sugar and beat with a mixer until white peaks form.

Then add turmeric, add one yolk at a time and continue beating until smooth.


Now line the bottom of the mold with parchment paper, then transfer the dough into it and place it in an oven preheated to 170 degrees for 35-40 minutes.

To ensure that the mass placed in the oven does not settle, it should be checked for readiness with a skewer no earlier than after 25 minutes.
The finished biscuit turns out airy and simply weightless.

For the cream, you need to combine milk, grated lemon zest in a saucepan, put it on the fire and as soon as the contents boil, immediately remove, strain and leave until completely cooled.

Meanwhile, in a separate container, combine and mix the egg yolks with sugar and flour.

Then pour in the milk mixture, put it on medium heat and stir constantly until it thickens slightly. Remove from the stove, cover with film and put in a cool place until it cools.

Take very cold, but not frozen cream and beat it until fluffy, gradually add powdered sugar, this procedure should take about 5 minutes.

Add custard and bring until smooth.

Now we take the finished biscuit, turn it over and cut off the top evenly.

Carefully remove the inner soft part and treat with apricot liqueur or liquid from canned apricots, as in the photo below.

We fill this basket with cream, only a few tablespoons need to be left.

We soak the cut cake with the same liqueur or juice, cover the basket with it and coat it with a thin layer of the remaining cream.
Divide the soft part of the baked goods, which was previously removed, into small pieces, cover the entire cake with them and put them in the refrigerator for one hour.

The result was an airy, very tasty cake with a light and dense cream.
Recipe for sponge cake in a slow cooker with cocoa

Ingredients:
- Flour - 2 cups
- eggs - 2 pcs
- sugar - 2 cups
- boiling water – 200 ml
- milk - 200 ml
- baking soda and baking powder - 1.5 tsp each
- cocoa - 6 tbsp. l
- vegetable oil - 1/2 cup.
- vanilla sugar - 20 gr.
Cooking method:
Beat eggs into a deep bowl, add vanilla and regular sugar. Beat with a mixer until foamy.

Add milk, sunflower oil to the egg mass and mix thoroughly.


Now we need to coat the multicooker bowl with butter and sprinkle with breadcrumbs. Then pour the prepared dough into it and set the “Baking” mode for 75 minutes.

After cooking, remove the finished sponge cake from the multicooker, serve with tea or cut into individual cake layers, layer with your favorite cream and sprinkle with chocolate chips.
Cake with sour cream, condensed milk and mararine

Ingredients:
- flour - 140 gr
- condensed milk - 1 can
- chicken eggs - 2 pcs
- margarine – 100 gr
- soda - 1/2 tsp
- cocoa - 2 tsp
- lemon juice.
- sour cream - 400
- sugar - 200 gr.
Cooking method:
Melt the margarine, combine it with condensed milk and mix.

Then add the eggs here and beat until smooth.

Now line a wide baking sheet with parchment paper, carefully pour half of the prepared dough onto exactly half the sheet. Level with a spatula.

Add cocoa powder to the rest of the dough, mix and spread on the second half of the sheet, and level it. Place in an oven preheated to 180 degrees for 10 minutes.

Meanwhile, we need to combine sugar with sour cream in a deep bowl and beat thoroughly until the sugar is completely dissolved.

After the time has passed, we take the baked cake out of the oven and cut it into three equal parts (leaving the separated excess edges) after which we grease each piece with sour cream and place it on top of each other, forming a cake.

We take the cake scraps, chop them and sprinkle them on them. Such a soft and delicious homemade cake from all sides. Try cooking it too!
Delicious kefir cake with cocoa

Ingredients:
- Flour - 250 gr
- kefir - 250 ml
- chicken eggs - 4 pcs
- sugar - 250 gr
- cocoa - 3 tbsp. l
- soda - 1 tsp.
Cooking method:
1. Beat eggs into a mixer bowl, add sugar and beat until it dissolves.
2. Add soda to the kefir, mix and wait a few minutes for the mixture to foam properly.
3. Combine the egg and kefir mixture, then mix well.
4. Sift flour and cocoa through a sieve, add small portions to the total mass and mix until smooth.
5. Line a deep baking dish with parchment paper (if desired, grease with butter), pour the dough into it and level it with a spatula.
6. Place in an oven preheated to 180 degrees and bake for 30-40 minutes. Check for doneness using a wooden stick; it should remain dry.
Video on how to make sponge cake with custard, fruits and berries
This wonderful cake for a home celebration is much tastier if it is made at home!
Enjoy your meal!!!
If you've ever tried to bake a classic sponge cake, you probably know that it's a terribly tricky pastry. You need to separate the whites from the yolks, then beat everything separately, combine, mix... The slightest mistake and you will end up with a “rubber” cake, it will fall or not rise at all. It’s very disappointing when so much effort and products are wasted in vain.
Down with the classic sponge cake! Today I will make a sponge cake, a very tasty and simple recipe, without separating the whites from the yolks. Don't be afraid, you will succeed the first time! This is the simplest sponge cake that always succeeds.
Everything is very simple and clear. Beat the eggs, then add sugar, beat again, add flour and baking powder. That's all! You can bake! And so that no difficulties arise, I have collected all the main rules, subtleties and little tricks - so that you and I always get delicious biscuits!
Products for sponge cake
Eggs
Chicken eggs used to make lazy sponge cake should be fresh and at room temperature. It is very important. They will take a little longer to beat than cold eggs. But the dough will immediately come out at room temperature, which means that when we put it in the oven, it will warm up faster and immediately begin to bake, and the cake itself will cook evenly.
I don't separate the whites from the yolks. First, beat the eggs until foamy, then gradually add sugar and beat for another 5-6 minutes. The result is a delicate egg mixture, airy and fluffy - ideal for baking a quick sponge cake!
Flour
The flour must be of the highest quality, and it must be sifted to enrich it with oxygen - for this the dough will be airy and the cake will rise better. I mix the flour with baking powder and sift it directly into the bowl with the egg mixture. I introduce it very carefully and gently. I move in a circle from top to bottom, stirring with a spatula (without a mixer!) so as not to precipitate the foam. As soon as the lumps disappear, stop mixing and the dough is ready.
Baking powder
According to this recipe, I prepare a sponge cake with baking powder. Soda is not suitable because there is no acid in the dough. The purpose of the baking powder is to maintain porosity and raise the dough a little more in the oven.
Which baking dish should I use?
A springform pan works best. The cake comes out of it very easily. If you don’t have a special mold, take heat-resistant dishes with thin walls and a side at least 5 centimeters high. The dough will increase in volume, so it should fill no more than 2/3 of the volume. Silicone and glass will not work.
I use a springform pan with a diameter of 26 cm - it turns out a sponge cake 5 cm high, from which it is easy to assemble a large cake! If you want, you can take a 25 or 24 cm mold without changing the amount of ingredients - but then the baking time will have to be increased by about 10 minutes (depend on your oven).
But don't use a mold that is too small, as there will be a lot of dough and there won't be room for it to rise. You cannot simply divide the ingredients in half; for molds of smaller diameter you need to completely recalculate all proportions.

The perfect sponge cake recipe: what else you need to consider
Don't reduce the ingredients
In order for the quick sponge cake to turn out tall and not fall off, you need to correctly measure the flour and granulated sugar. For a good result, feel free to beat 6 eggs and add all the products strictly according to the list. If you don’t have scales, you can measure with a glass, volume 200 ml: sugar 170 g = 1 partial glass, flour 190 g = 1 glass + 2 tablespoons.
Bake immediately in a preheated oven.
The oven must be heated in advance so that the biscuit begins to cook immediately. In a cold oven, the dough will fall faster than it warms up. For the same reason, you cannot hesitate: as soon as the dough is ready, it must be baked immediately. The pan should be on the middle level of the oven, without fan mode. DO NOT slam the door or hit the pan too hard.
“Forget” about the biscuit while it’s baking
Under no circumstances should you open the oven for the first 30 minutes while the cake is baking, otherwise all the puffiness will go away along with the heat. Bake at a temperature of 175-180 degrees. Then carefully (!) check the readiness of the cake without removing it from the oven - a standard test with a toothpick. If it's dry, it's ready. If the toothpick is sticky and wet, close the door quietly and continue baking until done.
Let the crust rest
After baking, I let the cake rest in the pan for 15 minutes. After that, I remove it and wait patiently for the biscuit to cool completely. Fresh baked goods do not cut well, so it is best to assemble the cake on the second day. By this time, the cakes will have finally “strengthened”, they will be much easier to cut, they will not wrinkle and hold their shape better, and will not sag even under heavy cream.

Ingredients
- chicken eggs 6 pcs.
- sugar 170 g
- wheat flour 190 g
- baking powder 1.5 tsp.
Ingredients for impregnation and layering
- 21% sour cream 400 ml
- gelatin 1.5 tsp.
- milk 50 ml
- powdered sugar 4 tbsp. l.
- canned peaches 150 g
- syrup 100 ml
Ingredients for buttercream
- 33% cream 200 ml
- powdered sugar 2 tbsp. l.
- fruits, candies, meringues, marshmallows for decoration
Yield: 26 cm mold
How to make a very tasty and simple sponge cake
 Before I start kneading the dough, I always turn on the oven to preheat to 180 degrees. Since the sponge cake recipe is quick, you need it to be warm when the dough is ready. I immediately prepare the springform pan so as not to waste time on it later. I line the bottom with parchment, and then grease the bottom and sides with oil (just a little, since the sponge cake doesn’t like excess fat). And I dust it with flour for easy removal so that the cake does not stick.
 I take the largest and deepest bowl in which it will be convenient to beat the dough with a mixer. I beat eggs into it - large, whole, at room temperature. Let me remind you that there is no need to separate the yolks; we have the simplest sponge cake recipe, without separate beating of the whites and other difficulties.
 I beat the eggs with a mixer. First at low speed for 1-2 minutes. Then I increase the speed and beat for another 5 minutes. The result is a very fluffy mass, it becomes more airy and increases in size by 3 times.
 Then you need to gradually introduce sugar. Without stopping whisking, I pour it in in a thin stream. I run the mixer at high speed for about 5-6 minutes. The consistency of the mass is like a cloud, very light and weightless, with a million small air bubbles. I turn off the mixer only when traces of the whisk begin to remain.
 Now it's time to add the dry ingredients. I immediately mix the baking powder with the flour and little by little, spoon by spoon, sift them through a sieve directly into a bowl.
 Very carefully, so that the egg mixture does not settle, I stir with a spatula. Never use a mixer!
 That's it, the dough is ready. I pour the biscuit mixture into the mold and gently turn it clockwise so that a dome does not form during baking. You can't knock on the form!
 Immediately put the pan in the oven - on the middle level. I bake at 175-180 degrees for 30 minutes, without blowing. Do not open the oven during this time! At the end, I check the readiness without removing the cake from the oven using a wooden skewer. If it is sticky, then you need to bake for another 5-7 minutes at the same temperature.
 My cake was baked in exactly 35 minutes, it was 5 cm high. The top was perfectly smooth, with a beautiful golden brown crust. If you have any bumps on the surface, it's okay, just turn the cake upside down.
 After cooking, I always leave the biscuit in the mold for 15 minutes. Then I remove it from the pan, turn it upside down and leave it on a wire rack to cool completely. You shouldn’t cut it right away - the biscuit needs time to “strengthen”. I usually let the cake rest overnight and assemble the cake in the morning.
 I cut the well-cooled cake into 2-3 parts. I don’t have a special device with a string for cutting sponge cake, so I use another method: from below, under the springform pan in which the cake was baked, I place a mountain of plates at the desired height, and then I cut it with a bread knife. This way you can evenly cut the biscuit into even the thinnest slices of any height.
 The cakes need to be soaked to make them juicier. Any syrup will do, with cognac or non-alcoholic. I have syrup from canned peaches. I apply it with a soft brush, just a little, about 1.5-2 tablespoons.
 Now you need to coat the cakes with cream. Any one you like will do. I have sour cream with peaches. To prepare it, I first beat the sour cream with a mixer for 5 minutes, adding powdered sugar to it. To thicken the cream, I dilute gelatin in milk (let it swell, bring to a boil and cool to room temperature), pour it in in a thin stream and whisk everything again. I add canned peaches, cut into large pieces, to the finished cream.
 I spread half the cream on the bottom of the cake, spreading it in an even layer.
 I cover with the second cake layer and apply the remaining cream. I leave the top of the cake clean - I will decorate it with whipped cream.
- Whipping cream is very simple. Using a mixer, I bring well-chilled 33% cream to peaks, and then gradually add powdered sugar, constantly whisking. I apply it to the cake using a pastry bag. I decorate with fresh fruit, chocolate truffles, marshmallows and meringues.
This is how the sponge cake turns out, very tasty - a simple recipe that you can easily repeat, even if you have never baked sponge cakes before!