What to make a model of the solar system from. Model of the Solar System: practical acquaintance with space
Maybe you love Space and want to have your own solar system? Or are you a parent who has children and they have been given a creative assignment for school? Whoever you are, if you have a desire to create a model of a three-dimensional and very similar solar system, read our article on DIY work.
The space theme is very attractive for children and adults. After all, she is so mysterious and enigmatic. With the help of a large and voluminous model of our solar system created by yourself, you can tell children about the structure of the Universe, show space objects and planets.
Of course, before you start working on a model of the Solar System, it will not be superfluous to remember all the details of its structure. Read astronomical literature and remember the main principle of the structure of the Universe: the Sun is in the center, and all the other planets revolve around it.
Master class on creating a do-it-yourself model of the solar system from plasticine
We offer you a detailed master class on sculpting a solar system from plasticine with your own hands. Prepare all the materials necessary for work:
- Multi-colored plasticine
- Thick cardboard in gray or dark blue (your future outer space)
- Wire
- Small carnation
All materials have been prepared, now you can get to work. Start sculpting the main central element of the system - the Sun. In order to achieve the desired color, mix several types of plasticine: yellow, white and orange. However, do not knead everything into a monochromatic mass, leave a little heterogeneity. Then attach this plasticine mass in the center of your thick cardboard, press and smear it with your fingers. There should be rays of the sun.
Now take white plasticine and twist thin sausages. These are preparations for future planetary orbits. Make nine rings around the Sun from these thin sausage threads.
Make the smallest planet in the system - Mercury. Make it from gray, brown and white plasticine. Using a small nail, make small holes across the surface of the entire planet - craters.
Make Venus three times larger than Mercury. Use grey, black and brown colors. Using wire, create the relief of the planet.
Now make planet Earth. Use green, blue and yellow plasticine.
To sculpt Mars you will need black and orange plasticine. Blend them to a marble effect.
Large Jupiter looks striped from a distance; to sculpt it you will need brown, beige and orange stripes.
Saturn is very similar to Jupiter in its color scheme and size, and don’t forget about the famous ring that surrounds Saturn.
Make Uranus from blue shades of plasticine. Imitation of Neptune - an ordinary ball of blue plasticine.
Pluto is another dwarf planet that requires gray and white colors to sculpt.
When all the planets are ready, lay them out in order (as shown in the photo) and attach them to the solar orbits.

You have created such a wonderful composition from plasticine. If a child gets such a visual aid, made with his own hands, he won’t even need an astronomy textbook.

Create a 3D model quickly and easily with your child
To sculpt such a model of the Solar System, you will only need matches and plasticine.
Start sculpting round balls - planets. Make an orange plasticine ball - this will be the Sun. Then mix orange and brown colors of plasticine and roll into a smaller ball. This will be Mercury. Do similar manipulations with the third ball, but add more brown color, and you will create Venus. Now our Earth: wrap a blue ball with a green sausage and spread it across the planet. By mixing red and a little black plasticine, you get the planet Mars. Make a larger ball from the brown plasticine mass and twist a couple of light brown sausages. Wrap the sausages around the planet and flatten. Jupiter is ready. Make a circumplanetary ring for Saturn. Mix gray and blue colors to create a small Uranus. Make Neptune from blue plasticine. You have finished sculpting the planets, start assembling the model.
To do this, take matches and string ready-made plasticine planets onto them. Place the sun in the center, and stick the planets on matches into it. Ready! Enjoy your 3D model of the Solar System.

Video on the topic of the article
At the end of our article, we invite you, dear readers, to watch several educational videos on creating a layout. We hope you find them useful. Enjoy watching.
Natalia Bubnova
I want to introduce you layout« Planets of the Solar System» with your own hands.
So, for outer space we will be needed:
Frame 30*50
Cardboard 30*50
We paint the cardboard black (if you have large-format black cardboard, you can use it, let it dry. Then we apply orbits with white gouache, draw stars with colored glitter or paints, you can draw constellations, meteorites, etc.
For creating we will need planets:
Foam balls 10 pcs. different sizes;
Cardboard for Saturn's ring.
PVA glue for fastening planets to cardboard;
We paint the balls with gouache, after coloring we give them ready planets dry up.
Our planets and outer space dried up. Can be glued sun and planets.
Arrangement order planets from the Sun next: Mercury, Venus, Earth, Mars, Jupiter, Saturn, Uranus, Neptune, Pluto, you can add the Earth's satellite Moon.
Model making solar system is a great way to explore space.
So that children remember the sequence planets of the solar system, you can use A. Haight’s poem
" 8 planets"
Everything in order planets
Any one of us will call:
One - Mercury,
Two - Venus,
Three - Earth,
Four - Mars.
Five - Jupiter,
Six - Saturn,
Seven - Uranus,
Behind him is Neptune.


Publications on the topic:
We continue to add visual aids to our “Nature Center”. To make the “Sea” model we will need: - A sheet of thick cardboard.
A SPACE ROOM was created in our kindergarten. Each group presented material on a space theme. The guys and I decided.
To make a model we will need: 1. A sheet of cardboard or fiberboard. 2. Foam plastic. 3. Newspaper. 4. Napkins. 5. Colored sand. 6. Gouache or watercolor.
Take a medium-sized hoop and wrap it with insulating tape. Cover it with fabric of the appropriate color. Make balls out of paper.
Marina Stolyarova
“Humanity will not remain on earth forever, but,
in pursuit of light and space,
at first it will timidly penetrate beyond the atmosphere,
and then he will conquer everything for himself circumsolar space"
K. Tsiolkovsky
Since ancient times, people's eyes have been directed to the sky. From the first steps on earth, man felt his dependence on the sky; his life and activities largely depended on it. Our ancestors knew and understood well "habits" sky. For them, the sky was alive, full, and manifesting itself in many ways. This love and knowledge of the sky must be cultivated in older preschoolers.
Target: create solar system layout and using his example to show that The solar system is a system of planets, in the center of which there is a bright star, a source of energy, heat and light - Sun. Nine major planets revolve around it in orbit.
Material: stationery glue, scissors, sewing threads of different colors, balloons, foil, hoop, waste material (paper, plastic boxes).
1. Prepare the necessary material. Inflate balloons of different sizes according to the required size solar system(planets, Sun) .

2. Thread a needle and pass it through the glue.

3. Wrap each ball with thread and let the glue dry.


4. After the glue has dried, remove the balloon from the threads by first untying it or bursting it.
5. For the planet Saturn, cut out a ring from foil or paper and glue it to the future planet.

6. Wrap threads around the hoop.

7. Cut out stars and comets from foil.


8. Make a ship from waste material.

9. Hang all planets, stars and comets in accordance with the location of the planets solar system. Sign the names.

10. The model of the solar system is ready.
Publications on the topic:
"Planets of the solar system" for group design for the thematic week "Space". Master Class. As in many other gardens, we had it.
Hello dear colleagues! I want to show you my model of "Planets of the Solar System". After all, soon April 12 is Cosmonautics Day, and the topic is...
On the eve of Cosmonautics Day, I prepared an informative visual aid to supplement educational environment materials in kindergarten.
I would like to present to your attention a model of the “Planets of the Solar System” with my own hands. Space is very big. Besides our Earth, there are others.
Any of us can name all the planets in order. One - Mercury, two - Venus, three - Earth, four - Mars. Five - Jupiter, six - Saturn, seven.
I would like to present to you a model of the “Planets of the Solar System” with my own hands. So, for outer space we will need: Frame 30*50.
On the eve of the anniversary of Cosmonautics Day, I offer you a master class on making a model of the “Planets of the Solar System”. Do it together.
"Solar system" with your own hands! July 29th, 2015
Every time the holidays come, after I'm glad that I no longer have to get up early and get the kids ready for school, and then rush there, trying not to be late for the start of classes, I think about what to do to keep them busy so that it doesn't happen. excruciatingly boring. Of course, the easiest and cheapest way is to stick a tablet in their hands, and there they will find cartoons, games, and other entertainment. But you don’t want it that way, you want the entertainment to be educational and developmental. And here you can’t do without invention and direct parental participation.
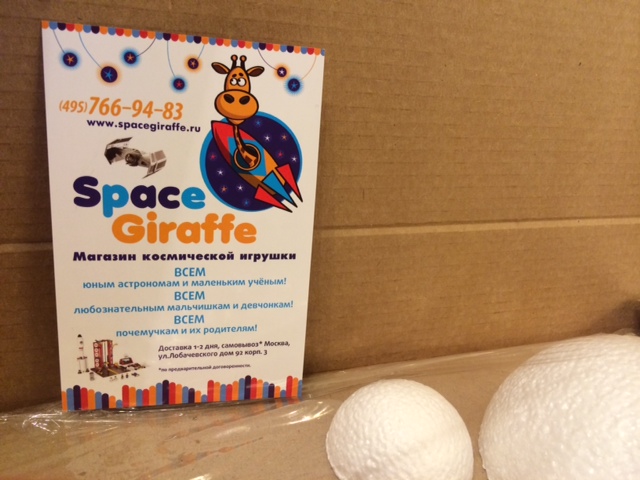
In April of this year, when we were on vacation in Moscow, the company Space Giraffe offered to test a children's creative kit "Solar system". I happily grabbed this opportunity, since Anya, following her dad Dima, has long shown a genuine interest in the topic of space and everything connected with it. Her passion is so strong that she has already managed to infect Leva with it, who quickly learned the names of all the planets with her help.

On the specified day, the set was delivered to us in an impressively sized box. The kids happily clapped their hands and jumped around while I unpacked it. And they were very surprised that there was nothing special inside. A set of paints, base cardboard and blank hemispheres, which were destined to become models of planets. Everything else is the work of the creator, into whose possession such a box falls, and the final result depends only on him.

First, it was necessary to prepare a cardboard base (60 x 40 cm), painting its entire surface black. Anya readily took on this task and, in the process of completing it, drew a little, and then joyfully painted over her pictures. She didn’t have enough strength to finish what she started (they ran out after the first 10-15 minutes) and I finished painting the base (of course, mom always gets the most boring part). However, I even liked it))) It’s quite nice to paint cardboard with black paint; this activity had a relaxing effect on me (what does a mother with many children need at the end of a working day?).

Everyone wanted to color the planets, even little Misha. We carefully switched Misha to other activities, and began to divide the planets between Anya and Leo. The greatest excitement was caused by the Sun and the Earth, the least by Mercury and Mars (because they are very small). There was almost a fight, so they painted the Sun alternately))))

While the planet models were drying, Anya began drawing orbits for the planets onto the black background base using white chalk, and I read them interesting facts about the planets that we were preparing to place on the base to create a model of the solar system as soon as they were ready.

For example, that time flows differently on different planets. One day on Mercury is 58 Earth days! And the mass of the Sun makes up 99% of the mass of the entire solar system. And also the fact that on the Moon a person weighs 6 times less than on Earth, due to the lower force of gravity, and that Saturn is not the only planet with rings of stones, ice and other particles. Similar rings exist around Jupiter, Uranus and Neptune, but only Saturn can be seen from Earth.
Taking into account the last fact, we decided not to make “rings” to any of the planets (for some reason we unanimously decided that our model of the Solar system in this form would look much more harmonious).
This is what we ended up with:

The model of the solar system looks quite impressive. Bright, educational, visual! And, most importantly, created with your own hands)
When D. returned home, Anya and Lev proudly showed him the fruit of their labor. I didn’t have time to capture Dima’s dad’s smile, but believe me, he was happy!)))
To make it easier for a child to learn school material, there are visual aids. And in order to learn to think on a “universal scale,” the universe must fit on his desk. And this is a great opportunity to show your creativity and, together with your child, make a model of the solar system with your own hands.
Joint creativity between parents and children always has a beneficial effect on friendly and trusting relationships between them. And in this case, it also has a cognitive purpose that will broaden the horizons of not only the child, but also the adult. Our solar system includes the Sun and nine planets with their satellites.
These are Mercury, Venus, Earth, Mars, Jupiter, Saturn, Uranus, Neptune, Pluto. They have different sizes, colors and at different distances from the Sun. This must be taken into account when making a model of the solar system.
In the model we simulate only planets, but if desired, we can also designate their satellites. To maintain the sizes of the planets in relation to each other, you can use the photo as a guide:
An endless universe of crafts
So how can you make a solar system model for kids at minimal cost? There are several ways.
The most primitive model of the solar system can be made from plasticine or salt dough, painted in the desired colors. It is suitable for the smallest babies.

This model will give the child an idea that all planets revolve around the sun and their number.
- let's blind the orange sun;
- brown-orange Mercury;
- in the same color we sculpt Venus;
- the Earth will be blue and green;
- black-red Mars;
- Jupiter will be brown;
- Saturn is blinded with rings;
- Uranium will be made of blue + gray mass;
- We make Neptune out of blue;
- gray Pluto.
We string all the “planets” onto wooden skewers and attach them to the “Sun”. For greater clarity, skewers can be made of different lengths. Ready.
A plasticine model can be made on a plane:


As a gift for a little schoolchild, you can make a model of the solar system from papier-mâché.
Papier-mâché (translated from French as “chewed paper”) is a plastic mass made from paper with the addition of binders and adhesives (starch, gypsum, glue).
A paper layout is the simplest and most affordable to make. A detailed master class with photos will help you make it.
Materials for work:
- newspaper;
- gray toilet paper;
- office glue;
- plywood sheet;
- colored gouache paints;
- quick-drying blue paint;
- some silver beads.
Make a ball of newspaper soaked in water.

We wrap it with toilet paper and roll this lump into a bun. Lubricate the paper bun with glue, spreading it evenly over the surface.
Leave the balls to dry at room temperature or on a radiator.

While the parts are drying, let’s prepare the basis of the layout: we cut out a circle of the required size from plywood, taking into account the size of the prepared planets. We paint it with blue paint.
We make scatterings of stars from silver-colored beads, evenly distributing them on a circle, according to the picture of the starry sky.

We paint the dried koloboks, imitating the color of the planets.

We will make the rings of Saturn from silver paper.

It is imperative to accurately position the planets in relation to the Sun.

We screw screws into the bottom of the plywood, according to the location of the planets.
We screw our “planets” on top of them.


Our model of the solar system is ready.

During the manufacturing process, you can tell your child about the structure of the solar system, about the planets and everything that will be interesting to him. And such a gift will take on special meaning for him.
A wonderful idea to create a model of the solar system as an element of the interior of a children's room.
First, we decorate part of the ceiling as a starry sky.

We make planets from papier-mâché as described above.

We paint them with acrylic paints. It is more effective to use glossy ones.


We pay a little more attention to the sun. We color and make rays from a strip of faux fur.


We attach a fishing line to the “planets” and secure them with paper clips or a stapler to the ceiling, observing the order of their location from the “Sun”.


Simple memos
Sometimes it is difficult for children to remember the names of objects that they do not often encounter in everyday life. To make it easier for them to memorize, adults come up with special rhymes in which the first letter of the word coincides with the first letter of the name of the object that needs to be remembered. Such poems are called mnemonic.
Probably, many in childhood learned the names and order of the colors of the rainbow from the phrase “Every Hunter Wants to Know Where the Pheasant Sits.”
Children's poems and funny phrases have also been invented to remember the names and order of the planets of the solar system. You can learn a poem by Arkady Khait with your child:
- Any of us can name all the planets in order: one - Mercury, two - Venus, three - Earth,
Four - Mars, five - Jupiter, six - Saturn, seven - Uranus, followed by Neptune.
Another well-known funny mnemonic phrase for older students:
- We Know Everything – Yulia’s Mom Got on Pills in the Morning.
Or another poem:
- There lived an astrologer on the moon,
He kept records of the planets.
Mercury - one, Venus - two, three - Earth, Four - Mars, Five - Jupiter,
Six - Saturn, Seven - Uranus, Eight - Neptune.
While making the model, the child will be happy to learn the names of the planets with the help of funny poems.
More layout options can be seen in the photo:


As you can see, making such crafts is not at all difficult. It is enough to be able to make balls from different materials and be able to use your imagination. And all participants in this educational process will benefit and enjoy it.
Video on the topic of the article